

Your vehicle’s finish takes a beating between scheduled maintenance visits, from sun exposure and road debris to the small dings that happen in parking lots. Whether your car recently left an auto body shop after repairs or you’re simply trying to keep factory paint looking sharp, the choices you make day to day matter more than most people realize. This guide walks through practical, no-nonsense steps for protecting your investment between professional appointments. You’ll learn how to spot early warning signs, avoid common mistakes, and know when it’s time to bring in a specialist.
Building a Simple Maintenance Routine
Most paint damage happens gradually, not all at once, which means a consistent routine is your best defense. Washing your vehicle every one to two weeks removes contaminants like bird droppings, tree sap, and road salt before they bond to the clear coat. Drying with a microfiber towel instead of letting water air-dry prevents mineral spotting that dulls shine over time. Parking in shade or using a car cover when possible also reduces UV fading, which is one of the most overlooked causes of paint deterioration.
- Use pH-balanced car soap instead of dish detergent, which strips protective wax
- Apply a wax or sealant every three months for an added barrier
- Keep a microfiber mitt dedicated only to paint, never wheels
- Address bird droppings and sap within 24 hours to prevent etching
What Happens to Paint After a Major Repair
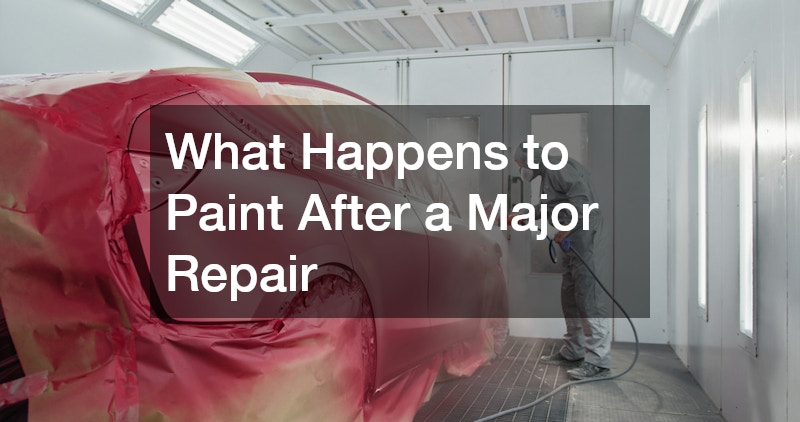
When a vehicle goes through collision repair, the finish in the affected area is essentially brand new and behaves differently than the surrounding factory paint for a period of weeks. Unlike original factory paint, which is baked on at high temperatures during manufacturing, fresh clear coat from an auto body shop typically air-dries or cures under lower-heat lamps, so the chemical hardening process continues long after the vehicle leaves the shop.
During this curing window, which can last anywhere from 30 to 90 days depending on temperature, humidity, and the products used, the new clear coat is more sensitive to harsh chemicals, automatic car washes, and direct sun exposure. Solvent-based cleaners, bug and tar removers, and even some quick detail sprays can interact with uncured solvents still evaporating out of the paint. Automatic washes are particularly risky because their brushes and high-pressure jets can mar a surface that hasn’t fully hardened.
Many shops recommend avoiding waxing or sealing the repaired panel for at least 30 days to let solvents fully evaporate, since sealing the surface too soon traps those gases beneath the film. Skipping this step can trap moisture underneath the clear coat and lead to cloudy or hazy patches later on. In more severe cases, trapped solvents can cause the clear coat to lift or bubble, which sometimes requires the panel to be repainted entirely.
Parking in the shade, hand washing with a pH-neutral soap, and checking with the auto body shop for their specific cure-time recommendations are simple ways to protect the investment while the new finish stabilizes.
- Hand wash repaired panels only for the first month, using a pH-neutral soap and microfiber mitt to avoid swirl marks in soft new clearcoat
- Avoid automatic car washes with abrasive brushes during curing, since fresh paint is softer and more prone to scratching for roughly 30-60 days
- Skip wax or sealant applications for at least 2-4 weeks, as trapping solvents beneath a coating can cause hazing or slow curing
- Ask your shop for specific curing timelines before applying protectant, since factors like paint type, temperature, and humidity affect drying speed
- Park in shade or a garage when possible, as direct sun and heat can accelerate surface curing unevenly compared to layers underneath
- Watch for slight color variation, which often blends further as paint cures and settles into surrounding panels over several weeks
Caring for the Surface After an Accident
Beyond the structural work, car accident repairs often involve blending paint across multiple panels to match color consistently, which is a delicate process. This blending work can be more vulnerable to swirl marks and scratches until it has fully hardened, so gentle hand techniques matter more here than usual. It’s also worth inspecting seams and panel gaps a few weeks after the repair, since minor shifting can sometimes occur as materials settle. Catching an issue early is far easier to correct than waiting until it becomes a bigger cosmetic problem.
- Inspect panel alignment and gaps a few weeks post-repair
- Photograph the repaired area monthly to track any changes
- Report any bubbling or peeling to the shop immediately
- Avoid parking under trees while paint fully cures
Managing Small Dings Before They Spread

Not every imperfection requires a full repaint, and many small imperfections can be handled through paintless dent removal, which preserves the factory finish. This method works especially well on shallow dents from hail, shopping carts, or minor door dings where the paint hasn’t cracked. Leaving a small dent untreated can eventually stress the surrounding clear coat, making cracks or chipping more likely over time. Getting it addressed early is usually faster and more affordable than waiting until it becomes a larger cosmetic issue.
- Check for cracked paint before assuming a dent is paintless-repairable
- Smaller, shallow dents are typically easier and cheaper to fix
- Untreated dents can trap moisture and lead to rust underneath
- Compare quotes since pricing varies based on panel location and depth
Protecting Components Under the Hood
The engine bay doesn’t get the same attention as exterior paint, but grime buildup can accelerate wear on hoses, belts, and wiring. Dust mixed with oil residue forms an abrasive paste that settles into rubber seals and electrical connectors, quietly shortening their lifespan. A simple wipe-down every few months, using a degreaser safe for engine components, keeps these parts in better condition without requiring a full detail.
Routine auto engine repairs are also far easier for technicians to diagnose when the engine bay is reasonably clean, since dirt and oil residue can mask leaks or cracked components. A hairline crack in a hose or a failing gasket often reveals itself through small stains or seepage, but only if the surrounding surfaces aren’t already coated in months of accumulated grime. Clean surfaces also mean less time spent on labor charges for cleaning before an inspection can even begin.
It’s also worth paying attention to how your exhaust system is venting, especially if you notice unusual odors inside the cabin, a metallic smell, or visible discoloration near the tailpipe. These can signal anything from a minor gasket leak to a more serious issue with the catalytic converter. Proper car exhaust extraction during service visits ensures fumes are safely removed from the work area, protecting both the technician and the vehicle’s sensitive components from prolonged exposure to concentrated exhaust gases.
At home, running your vehicle in a well-ventilated space matters just as much, since enclosed garages can trap carbon monoxide and other harmful byproducts. Leaving a garage door open or using a portable exhaust fan during extended idling reduces this risk considerably. These small habits, combined with regular cleaning, go a long way toward preserving what’s under the hood between professional visits.
- Wipe down visible engine bay surfaces monthly with a designated engine-safe cleaner, avoiding electrical connectors, sensors, and wiring harnesses
- Check hoses and belts for cracking, fraying, or a glazed appearance while you clean, since these often fail without warning
- Watch for oil residue or dark spots beneath the car that may signal a developing leak
- Check fluid levels monthly, including oil, coolant, and brake fluid, and note any unusual color or cloudiness
- Never idle your car in an enclosed garage without ventilation, as carbon monoxide can build up within minutes
- Keep the garage door open or run a fan if you must let the engine run indoors for any reason
- Note any new smells or sounds, such as burning rubber, sweet coolant odor, or ticking, and mention them at your next service
Keeping Tires and Alignment in Check
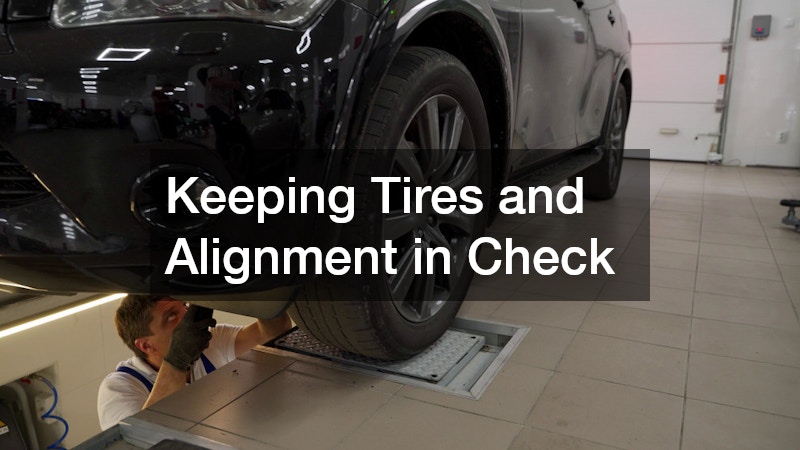
Uneven tire wear is one of the clearest signs that your vehicle needs attention, and it often points to alignment issues rather than the tires themselves. Visiting reputable car alignment shops periodically helps extend tire life and improves handling, especially after hitting a significant pothole or curb. Misalignment doesn’t just affect performance either, it can cause your vehicle to pull to one side, making everyday driving feel less stable. A quick alignment check twice a year, or after any noticeable impact, can save money on premature tire replacement down the road.
- Inspect tire tread for uneven wear patterns monthly
- Get an alignment check after hitting a deep pothole or curb
- Rotate tires on schedule to promote even wear
- Pay attention if your steering wheel isn’t centered while driving straight
Maintaining Window Film and Tint
Tinted windows do more than add style, they block harmful UV rays and reduce interior heat buildup, but they still require proper care to last. A quality auto window tint service will typically recommend avoiding window cleaners with ammonia, since it can break down the film’s adhesive over time. Using a soft cloth and ammonia-free glass cleaner keeps the tint looking clear without bubbling or peeling at the edges. If you notice discoloration or lifting corners, it’s best to have it addressed before moisture gets trapped underneath.
- Avoid ammonia-based cleaners on tinted windows
- Wait several days after installation before rolling windows down
- Use a soft microfiber cloth to prevent scratching the film
- Address bubbling or peeling early to avoid full replacement
Preserving Custom Wraps and Graphics
Vehicles with custom decals or branding need a slightly different care approach than standard paint. Car graphics are typically applied as vinyl layers, which means harsh scrubbing or high-pressure washing can lift edges or cause premature fading. Pressure washers set above 1,200 PSI, or nozzles held too close to seams, are especially risky since they can force water underneath the vinyl and weaken the adhesive over time.
Hand washing with a gentle, pH-neutral soap and a soft microfiber cloth helps the graphics maintain their color and adhesion for years. Avoid abrasive tools like brushes with stiff bristles or dish soap, which can strip the protective laminate layer and dull the finish. Drying with a clean, soft towel rather than letting the vehicle air-dry also reduces water spotting on the vinyl’s surface.
Waxing directly over vinyl graphics is also generally discouraged, since certain wax formulas can cause discoloration or a hazy appearance. If a vehicle owner wants added protection, a vinyl-safe sealant or a ceramic coating specifically labeled for graphics is a safer alternative to traditional carnauba or petroleum-based waxes. Checking the wrap manufacturer’s care guidelines beforehand can also clarify which products are compatible with the specific vinyl film used.
- Hand wash graphics with a soft sponge or microfiber mitt and pH-neutral soap, staying under 1,200 PSI if you do use a low-pressure rinse
- Avoid waxing directly over vinyl unless the product label specifically states it’s vinyl-safe, since standard waxes can dull or discolor graphics over time
- Use a dedicated vinyl sealant or ceramic spray designed for wraps every 60-90 days to add UV protection without clogging seams
- Keep the vehicle out of direct sun for long periods, or use a breathable car cover, to reduce fading and prevent the adhesive from softening in extreme heat
- Address lifted edges quickly with a heat gun or hairdryer on low heat before dirt or moisture gets trapped underneath and spreads the lift
- Skip automatic car washes with abrasive brushes, which can snag seams and accelerate peeling at panel edges
Protecting the Interior and Electronics

Interior components deserve just as much attention as exterior finish, especially if you’ve had upgrades installed. A professional car audio service often involves running new wiring through door panels, kick panels, or the trunk, and it’s worth periodically checking that trim pieces remain properly secured afterward. Give panels a gentle push or pull by hand every few months to make sure clips haven’t loosened from vibration and repeated door slams.
Loose panels can lead to rattling noises or, worse, expose wiring to unnecessary wear from rubbing against metal edges or moving parts. Over time, this friction can wear through insulation and create shorts, blown fuses, or even minor electrical fires in extreme cases. If you notice new rattles after an installation, it’s worth a quick visual check before the sound gets worse or the wiring gets damaged.
Keeping the interior clean and free of spilled liquids near audio components also helps prevent corrosion on connectors over time. Even small amounts of soda, coffee, or condensation from cup holders can wick into wiring harnesses and amplifier connections, causing intermittent power loss or static. Wiping up spills immediately and using seat covers or floor mats in high-risk areas can go a long way toward protecting your investment.
- Check trim panels periodically for looseness after any audio installation, especially around the dash and door cards where clips wear out
- Keep liquids away from speaker grilles and head units; a spilled drink can short a system in seconds
- Use interior UV protectant on dashboards every 30-60 days to prevent cracking and fading from sun exposure
- Choose a matte, non-greasy protectant formula to avoid a slippery steering wheel or hazy windshield glare
- Address unusual rattles promptly to catch loose wiring early before connectors work free entirely
- Wipe down touchscreens with microfiber cloths only, since paper towels and household cleaners can strip anti-glare coatings
- Vacuum door pockets and console bins monthly to prevent debris from jamming window switches or USB ports
Protecting your vehicle’s finish doesn’t require expensive products or constant trips to a shop, just consistent attention and a willingness to address small issues before they grow. Pay attention to how your car looks and sounds after any repair, and don’t hesitate to reach out to a trusted professional if something seems off. Small, proactive steps between service visits will keep your vehicle looking and performing its best for years to come.